In the second post I took a Discoverer worksheet and showed a barebones BI Publisher report created using that worksheet as the data source. No layout, no template, but showed glimpses of what is possible here.
This, the third post, goes a bit further, wherein I focus on the basics and show how you can take a single Discoverer worksheet and from it create multiple tables, charts, crosstabs, totals, etc... Basically to showcase one of the benefits of this integration and of the capabilities of hi fidelity layouts that BI Publisher enables. For specifics and details on BI Publisher I would suggest going to OTN and going over the excellent documentation (PDF User Guide, or HTML version), OBEs (Oracle By Example), the BI Publisher blog, or the other training material available from Oracle University.
Let's start from the beginning, a very good place to start.
Using a public connection ('Sales History' - as in based on the SH schema), I have created a Discoverer workbook, which has two worksheets in it. One worksheet is a table while the other is a crosstab (pivot table).

The table and pivot table are identical as far as the items go - both have the same items (fields if you will) on them, and both have the same parameters in use.

There is a parameter on 'Product Category', on 'Year', and one on 'Region'. The 'Year' parameter accepts only single values, while the other two parameters can accept multiple values - that is the way I have defined the parameters sir, not that 'Year' is any snootier than the other parameters.

And for reasons that may become clearer in a future post (or else it can become the plot for a blockbuster whodunit - 'The Curious Case of the Gratuitous Properties Screenshot') you can see the workbook properties, including the name, the identifier, and owner.

Using the steps I outlined in an earlier post, I create a BI Publisher report and point to this Discoverer worksheet as my data source. So, the first step is to create a new report as shown below, and give it a name.


If you remember, in the previous post I showed how you could use the web interface to specify that the data set for a BI Publisher report could come from a Discoverer worksheet. Well, there is more than one way to skin a cat (or is it 'bell a cat'? In any event I am a vegetarian, so these jokes are in extremely poor taste... the word 'taste' itself is a poor pun), and we shall look at a few
For that, let's go to Word and logon to BI Publisher from the 'Oracle BI Publisher' menu in Word. If you do not have the BI Publisher Template Builder for Word installed you can do that by downloading it from the BI Publisher Enterprise site.


After you have logged in the Template Builder displays a window for you to select either a template or define a new template.
So, if you remember the report we created in BI Publisher a few minutes back, you can now browse to the report (I saved it under 'Shared Folder' : 'Discoverer'). You can see from the right hand panel that my report is there: 'Sales History 1'). But if you look down at the panel at the bottom, the one that says 'Layout Templates', it is empty. Right? Correct? Yes. That is because we do not have a layout template defined for this report. And that is what this post is all about, right? So what I could do here is double-click the 'New' text and begin creating a layout template for this report.

More Than One Way To Create a Layout
But.... let's step back a minute (please do not try this when standing near a precipice, lest you bring matters to an abrupt end) and ask ourselves: "what if I wanted to start in Template Builder to begin with, and did not actually have a report created in BI Publisher Enterprise?" theek hai (ठीक है)- that's not a problem. You can begin in Template Builder itself.
Simply click the 'Workspace' dropdown and select 'Discoverer' from the dropdown list of values. You can see that 'Oracle BI' would actually take you to an Answers repository (or BI EE), whereas selecting 'Discoverer' takes you down the BI SE path.


Click 'Discoverer' and out pops a dialog asking you to select a connection - you see the Sales History connection: that's what you have to select. And the 'Select Connection' dialog couldn't be any more self-explanatory.
If you are familiar with Discoverer, and I dearly hope you are - else this whole series of posts is going to go down into the big aluminum can marked as non-bio-degradable, then you will know that I still have to select a workbook and worksheet. Once you have selected the connection the list of workbooks is displayed as a hierarchical list at the left, while the panel at the right shows the worksheets available. You will notice that because the Discoverer relational folder structure is basically one level deep (you do not have sub-foldering in Discoverer relational) the expand/collapse signs are a bit redundant and clicking them doesn't really do anything. They are useful when browsing workbooks from an OLAP connection. Anyway....

Say for this exercise I want to use the Discoverer table worksheet above, I double-click it. I now have to select a location in BI Publisher where this report should be saved under. So, another popup appears asking me to do that. In this case I choose to save it under the 'Shared Folder' folder directly (I already have one BI Publisher report based on the same Discoverer worksheet saved under the 'Discoverer' sub-folder).

Trust but verify - so let's make a quick detour into BI Publisher on the web and see whether the report does indeed exist where it should. Under the 'Shared Folders' folder you can see the report has been saved, and with a default name - 'For BI Publisher.Table' - which is a concatenation of the Discoverer workbook and worksheet name. And if you so desired you could click the 'Edit' link and you would see all the appropriate fields populated with values - just as if you had created the report from the web interface of BI Publisher. So you see.. that's what I meant that there is more than one way to bell the cat (CAT aspirants - sorry... but this is not what you are looking for).

Let us now return to Word and the Template Builder that is still waiting for us to return from this needless diversion and get down to the task of actually building a layout.
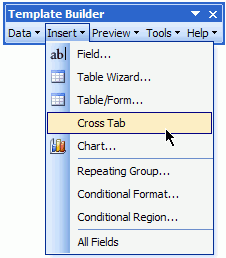
From the BI Publisher toolbar click 'Insert' and select 'Crosstab' as shown below.

The Cross Tab layout editor is quite simple and intuitive to use. It's after all meant to let you layout your fields on the two edges (column and row) and drop a measures item onto the body of the crosstab. You can click 'Preview' to see how the crosstab shall look like, or simply click 'OK'.

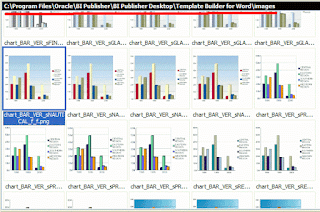
I also have added a couple of charts - the layout editor is again simple enough to use... It's probably a good idea to select a style and to uncheck the '3D' and 'Gradient' checkboxes. I don't like 3D effects or gradients in charts. Yes, yes, I am being rude in foisting my personal opinions, but regular readers of this blog would have been inured to that by now (I hope). A quick note, a sort of gotcha to be aware of. The image that gets displayed in the chart section of the editor is actually a sample image. There is one image for each combination of chart type and style and 3D effect and Gradient effect. There are more than 900 such images, one for each combination, that are available to the Template Builder.

So what does it have to do here? Simply this, that if you click the 'Preview' button, the image changes to show you an actual version of the chart based on your data. Then if you change any property in the chart the image reverts back to a standard, canned image from the stock images. So don't panic - this is expected behavior, and certainly simpler than generating a new image at design time everytime you change a graph property.

So, I now have one crosstab, two bar charts - one for Sales and one for Quantity, and I shall add one table, using the Table wizard. The wizard is, again, fairly straightforward to use.

Having selected all available fields to include in my table, this next screen is important as it lets me specify how I want my fields to be grouped. Here I want a grouping by Year ('Group above') and then by Quarter.

So now I have my four views defined.

Using these layouts, I want to preview my report. At this point more than the appearance I want to make sure that my data appears ok and that the views - the crosstab, the table, the charts - are all there in the report. If I click 'Preview' and select 'PDF' I shall be first prompted to save my report as a RTF file.
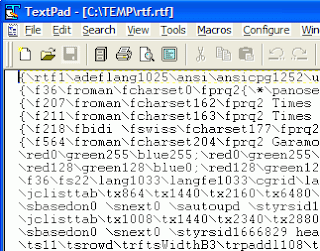
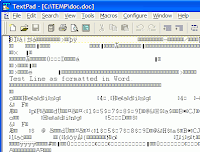
Why RTF? Because RTF is not a proprietary format like the binary DOC format that Word uses by default. As a diversion (yet another one!), take this very simple Word document with one line as shown below, and save it first as a .doc document and then as a RTF format document. Open the .RTF and .DOC files in a text editor and you shall see what I mean.


This is how my reports appears. You would notice that all the layouts are there as they should be. But not very pretty. This is because I have not started formatting them as I would like to. I am using Word, so that should be a fairly easy task to do. All I need to know is how to use the formatting capabilities of Word - headings, fonts, colors, page-breaks, table borders

Without getting into the specifics of what and how I format I report, this below is a preview of the same report, but after I have applied lots of formatting, layout changes - and yes one change - I added a Pie graph also to the report.

This below is the same report - what I have done is added an image to the header of the page so that it appears at the top of every page (as I have always maintained, an image is worth a thousand words, or sometimes even more)


See this screenshot below - this is the table I had defined above. What I have done is applied a 'Heading 1' level style to the 'Year' and 'Quarter' items, and also a blue background. That may not be the prettiest style, but then I am not an interface designer, and like a good man I know my limitations (or maybe not).
Another thing of note that I want to point out are the totals that I have inserted at the end of each country below. That is very easily done by usnig the Template Builder option of inserting a field and then selecting the 'sum' as the aggregation method.

And in the footer of the page I have set the page numbering. And oh yes, I also have a page break after every country, so that each country's data appears on a new page - again using Word's insert page break feature (or simply enter 'Ctrl+Enter' where you want the page break - but you already knew that).

Having created on layout template, I now want to upload this to the BI Publisher Server. That can be done in two ways. You can do that straight from Word itself. Simply select 'Upload Template As...' from the Template Builder menu.

Enter a name for the layout template and click 'OK'

And voila! It's done.

You would already have guessed that using the option I could make changes to the layout template in Word and upload it as a new layout, and so on. So by making incremental changes I could very quickly create new layouts for use.
Back at BI Publisher in the browser, I now want to run the report and view it in any of the supported formats: The parameters are displayed for me to select from. And, to repeat, you can either multi-select or single-select depending on how the parameters have been setup in Discoverer.


A simple post - the next one shall look at something different in this area.